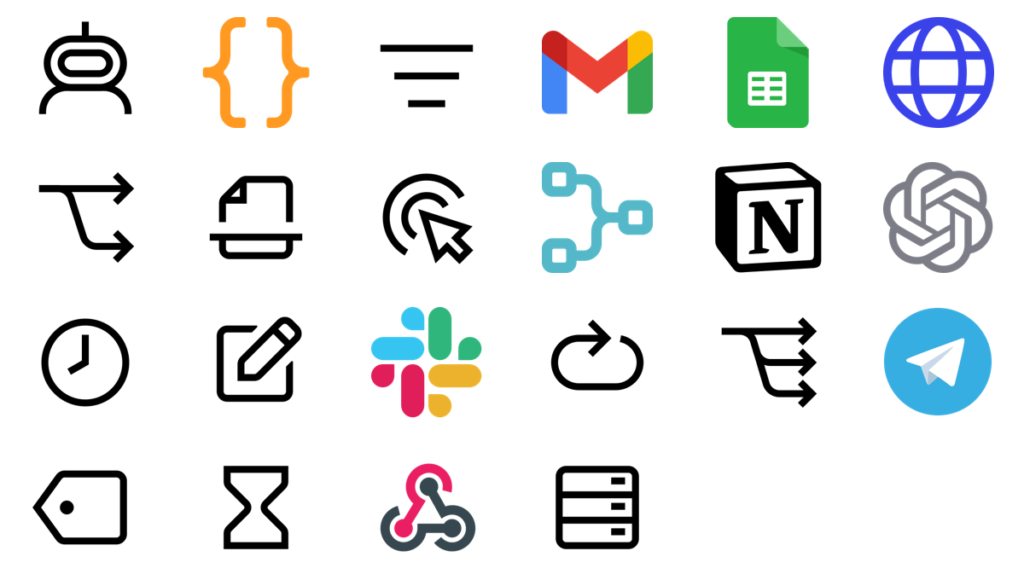
n8n has over 400 nodes, and every beginner asks the same question: what does each node actually do? This visual guide explains the 22 most essential n8n nodes — the ones used in 90% of real workflows — each with its real icon picture. Once you know these, you can read and build almost any n8n workflow.
TRIGGER NODES — NODES THAT START WORKFLOWS
Every workflow needs a trigger — the node that starts everything. Here are the three you’ll use most.
1. Manual Trigger

Every workflow starts with a trigger, and while you’re building, that trigger is almost always the Manual Trigger. It does exactly one thing: when you click ‘Execute’ in the n8n editor, the workflow runs. There are no settings to configure — it’s purely a ‘run it now’ button for development. This makes it perfect for the building phase: you add nodes one by one, press Execute, and watch real data flow through each step so you can debug as you go. You can even run only part of a workflow by executing from a specific node. Once everything works, you replace it with an automatic trigger (Schedule, Webhook, or an app trigger) and activate the workflow. Think of the Manual Trigger as training wheels — essential while learning and building, removed when you go live.
2. Schedule Trigger

The Schedule Trigger runs your workflow automatically on a timetable — no clicks needed. You can set simple intervals (every X minutes, hours, days, weeks, or months) or write a custom cron expression for precise schedules like ‘every weekday at 9:00 AM’. Key settings include the interval, an optional start date, and the timezone (important if your audience is in a different zone than your server). Typical uses: a daily sales report emailed every morning, an hourly check for new form submissions, or a weekly database cleanup every Sunday night. One tip: keep the interval as relaxed as your use case allows — polling every minute for something that changes daily just burns executions. On n8n Cloud the scheduler just works; on self-hosted setups, make sure your server clock and timezone are correct.
3. Webhook
The Webhook node gives your workflow its own unique URL — and whenever any app or service sends data to that URL, your workflow starts instantly with that data as its input. n8n provides two URLs: a test URL for building (click ‘Listen for Test Event’, then send data) and a production URL that works once the workflow is active. You can accept GET, POST, PUT, PATCH, and DELETE requests, and secure the endpoint with basic auth, header auth, or no auth for public forms. This is the universal glue of n8n: Stripe payment events, GitHub commits, contact-form submissions, or any custom app can trigger your automations. Pair it with the ‘Respond to Webhook’ node when the sender needs an immediate reply (like confirming receipt).
CORE & LOGIC NODES — THE BUILDING BLOCKS
These nodes do the actual work: fetching data, transforming it, and making decisions. You’ll see them in almost every workflow.
4. HTTP Request

If an app has a web API but n8n has no dedicated node for it, the HTTP Request node is your answer — it’s a universal API client. It can send GET, POST, PUT, PATCH, and DELETE requests to any URL, with full control over query parameters, headers, and body data (JSON, form-data, or raw text). Authentication options include none, basic auth, bearer tokens, and OAuth2, so it handles everything from simple public APIs to secured enterprise ones. It even supports pagination (automatically fetching page after page of results) and lets you import a cURL command to configure everything in one click. Real-world uses: pulling data from a custom CRM, posting to an internal API, or fetching live prices from a data provider. Master this node and virtually no app is out of reach.
5. Code

The Code node lets you write your own JavaScript or Python directly inside a workflow — it’s the escape hatch for anything too custom for ready-made nodes. You get full access to the incoming data ($input.all() gives you every item, $json the current one), and whatever your code returns becomes the output for the next node. Two run modes matter: ‘Run Once for All Items’ (your code sees the whole dataset at once — best for transformations) and ‘Run Once for Each Item’ (simpler per-item logic). Use it for complex data reshaping, calculations, date math, parsing unusual formats, or calling libraries. Debugging tip: use console.log() and inspect the output panel. One caution: with great power comes messy workflows — if a task can be done with built-in nodes, prefer them for readability, and reserve Code for the genuinely custom 10%.
6. Set (Edit Fields)

Set — labeled ‘Edit Fields’ in current n8n versions — is the node you use to shape data by hand. It lets you define fields manually: rename a field, add a fixed value (like a status flag or today’s date), combine several values into one, or compute simple expressions by dragging data from earlier steps. You can choose to keep only the fields you set (clean output) or include all incoming data alongside them. It sounds simple, but it’s one of the most-used nodes in n8n: almost every workflow needs a moment where data must be renamed, enriched, or restructured before the next step accepts it. Example: an API returns ‘usr_nm’ — you use Set to rename it to ‘username’ and add a ‘processed_at’ timestamp before saving to your database.
7. IF

The IF node is n8n’s basic decision-maker: it checks a condition and sends each item down the TRUE output or the FALSE output. Conditions can test strings (contains, equals, starts with), numbers (greater than, between), booleans, dates, and arrays — and you can combine multiple conditions with AND/OR logic (e.g., ‘amount is greater than 100 AND country is Pakistan’). Every workflow with logic uses it: route VIP customers one way and everyone else another, skip processing when a field is empty, or send alerts only when a threshold is crossed. In current versions the condition builder is visual and forgiving, but watch your data types — comparing the text ‘100’ with the number 100 can surprise you. Tip: when you need more than two outcomes, graduate to the Switch node.
8. Switch

The Switch node is IF’s bigger sibling: instead of just true/false, it routes data down one of several paths based on rules you define — for example, sorting support tickets into Billing, Technical, Sales, or General. Each output gets its own rule (using the same condition types as IF: equals, contains, greater than, etc.), and you can add a fallback output for items that match nothing, so nothing ever silently disappears. It’s the clean way to handle multi-way decisions without chaining ugly nested IFs. Classic use case: an email classifier’s categories each get their own branch — Business emails go to the CRM branch, meeting invites go to the calendar branch. Keep the number of branches reasonable; if you find yourself needing ten outputs, your categories probably need simplifying.
9. Merge
Whenever your workflow splits into branches (after an IF, Switch, or parallel paths), the Merge node brings them back together. It offers several modes: Append (stack the items from all branches into one list), Combine (pair up items from two branches), Merge By Key (join like a database JOIN — match items sharing an ID), and Choose Branch (pick one branch’s output). An everyday example: one branch fetches customers from your CRM, another fetches their recent orders — Merge By Key on customer ID gives you complete records. Another: after an IF split processed VIPs and regulars separately, Append reunites them for a single ‘send summary email’ step. Choosing the wrong mode is the most common Merge mistake — if your output looks duplicated or empty, the mode is the first thing to check.
10. Filter

The Filter node is IF’s stricter cousin: it keeps only the items matching your conditions and silently drops the rest — there’s no ‘false’ output. Conditions work exactly like IF (string, number, date comparisons, AND/OR combinations). Use it when you simply want to narrow a dataset: from 500 incoming emails keep only the ones from your boss, from 1,000 products keep only those in stock, from a webhook payload keep only events of type ‘payment succeeded’. Because there’s no second output, it’s cleaner than IF whenever you don’t need the rejected items. One caution: since dropped items vanish without a trace, double-check your conditions on a small test batch first — an over-strict filter is a classic cause of ‘my workflow ran but did nothing’.
11. Split In Batches (Loop Over Items)

APIs hate being flooded — most rate-limit you if you send hundreds of requests at once. The Split In Batches node (labeled ‘Loop Over Items’ in newer n8n versions) solves this by processing your data in small groups: you set the batch size (say, 10), and the node loops, sending 10 items through the rest of your workflow, then the next 10, until everything is done. A second ‘done’ output fires when the loop finishes, so you can trigger a final step like ‘send completion report’. Typical use: syncing 5,000 contacts to an email tool 50 at a time. Pro tip: pair it with a short Wait node inside the loop (e.g., 1 second) to stay comfortably under strict rate limits. It’s the difference between a workflow that works on 10 test items and one that survives 10,000 real ones.
12. Wait

The Wait node pauses your workflow mid-run and resumes it later — with three modes. ‘After a time interval’ waits a fixed period (e.g., 2 days, then send a follow-up email). ‘At a specific time’ waits until a date/time you provide (e.g., remind me on the invoice due date). ‘On webhook call’ pauses indefinitely until an external system pings a unique resume URL — perfect for approval flows (‘wait until the manager clicks approve’). Important detail: while waiting, the execution sleeps without consuming resources, but on self-hosted n8n the instance must stay running. Example workflows: abandoned-cart sequences (wait 24h, send reminder, wait 3 days, send discount), or HR onboarding spaced over a week.
APP INTEGRATION NODES — CONNECT YOUR TOOLS
These nodes connect n8n to the apps you already use — no API knowledge needed.
13. Gmail

The Gmail node connects your Gmail account to n8n via Google OAuth2 (a one-time setup in Google Cloud Console with the Gmail API enabled). It works both as a trigger (‘On Message Received’ — fires for every new email) and as an action node with operations like Send, Reply, Get, Delete, Mark as Read, Add Label, and Create Draft. That combination powers the most popular email automations: AI classifiers that label incoming mail, auto-responders, daily digest emails, and attachment processors. Best practice: for anything AI-generated, use ‘Create Draft’ instead of ‘Send’ at first — you review the draft, and only switch to auto-send once you trust the output. Watch Gmail’s sending limits (roughly 500 emails/day on free accounts) for bulk workflows.
14. Google Sheets
The Google Sheets node turns a spreadsheet into your workflow’s simple database. Operations include Append (add new rows at the bottom), Update (change specific rows), Read (get rows, with filters), Clear, and even Create Spreadsheet. You pick the document and sheet either from a dropdown or by pasting the sheet URL. It’s the fastest way to give a workflow persistent storage without setting up a real database: log every order to a sheet, keep a list of processed IDs to prevent duplicates, or store configuration (like label names for a classifier) that you can edit without touching the workflow. Tips: ‘Append’ is safest for logs (never overwrites); for updates, read the row first to get its exact position. For heavy or relational data, graduate to a proper database later — Sheets is for simplicity, not scale.
15. Slack

The Slack node plugs n8n into your team’s Slack workspace (via OAuth). As an action it can send messages to channels or DMs, update or delete messages, add reactions, and upload files. As a trigger it reacts to events like new messages or reactions. The killer use case is notifications: ‘new order, ping #sales’, ‘server error, DM the on-call engineer’, ‘daily 9 AM, post yesterday’s stats to #general’. You can format messages with Slack’s mrkdwn (bold, links, bullet lists) and even build interactive approval flows with buttons. Setup is a standard OAuth click-through, but note: the Slack app must be invited to private channels before it can post there — a common gotcha. For high-volume alerts, send one summary per hour instead of pinging per event.
16. Telegram

The Telegram node is the bridge between n8n and Telegram, authenticated with a bot token from BotFather. As a trigger (‘On Message’), it fires whenever someone messages your bot — the foundation of Telegram chatbots. As an action, it can send text, photos, documents, locations, and even polls, with Markdown/HTML formatting for bold, italics, and links. That dual role makes it one of n8n’s most versatile nodes: AI chatbots (trigger, AI Agent, send reply), instant alerts (‘website down’ straight to your phone), daily reports delivered as a morning message, or file delivery bots. Tips: keep messages under Telegram’s 4096-character limit (split longer texts), and remember bots can’t message users first — the user must start the conversation (or add the bot to a group) before you can send to them.
17. Notion

The Notion node connects n8n to your Notion workspace via the Notion API (OAuth or internal integration token). Its main operations: create pages, update page properties, query databases (with filters and sorts), and append block content. This makes it ideal for automating knowledge work: log every completed task to a Notion database, auto-create a meeting-notes page from your calendar, or run a content pipeline where AI-drafted posts land in Notion for review. To target a database, grab its ID from the Notion URL. Gotchas: the integration must be explicitly shared with each database/page it touches (Notion’s permission model — the number-one setup headache), and rich text comes back as structured blocks, so use the simplified output option when you just want plain values.
AI NODES — GIVE WORKFLOWS A BRAIN
These nodes bring artificial intelligence into your workflows — from simple classification to fully autonomous agents.
18. AI Agent

The AI Agent node is n8n’s autonomous brain: instead of you wiring every step, you describe a goal and the agent figures out the steps itself. It works in a loop — think, pick a tool, run it, observe the result, repeat — until the task is done or it hits the max-iterations limit you set. You connect four things to it: the user’s input (chat text), tools (other nodes like Gmail, HTTP Request, Calculator, or sub-workflows it can call), a chat model (the thinking engine), and memory (so it remembers the conversation). Use cases: customer-support bots that can actually check orders and issue refunds, research assistants that browse and summarize, personal assistants that manage your calendar and inbox. The quality secret: a clear, specific system prompt plus a small set of well-described tools beats a vague prompt with twenty tools every time.
19. OpenAI Chat Model

The OpenAI Chat Model is a sub-node — it doesn’t run on its own but plugs into AI Agents, Text Classifiers, Information Extractors, and chains as their ‘thinking engine’. You connect it with an API key from platform.openai.com and choose a model: gpt-4o-mini is the sweet spot for most n8n work (fast, cheap, smart enough for classification and extraction), while gpt-4o handles harder reasoning. Key settings: Temperature (0 = precise and deterministic, higher = more creative) and Max Tokens (caps response length and cost). Since every AI call costs a fraction of a cent, design with cost in mind: use mini models for bulk classification and reserve flagship models for the tricky 5%.
20. Text Classifier

The Text Classifier takes any text and sorts it into categories you define — using AI, not keyword rules. You write each category as a name plus a short description with 1–2 examples (e.g., ‘Urgent: needs a reply today, like server outages or angry customers’), attach a chat model, and the node returns the best-matching category per item. It’s the heart of email triage, support-ticket routing, feedback sorting, and content moderation workflows. Accuracy tips from experience: 3–6 well-described categories beat 15 vague ones; examples in the description matter more than clever wording; and test with 20–30 real samples before going live, refining any category that gets confused. Each classification costs a fraction of a cent with a mini model — personal inboxes cost almost nothing to run.
21. Information Extractor

While the Text Classifier sorts text, the Information Extractor pulls structured facts out of it. You define an output schema — the fields you want (e.g., name, email, order_total, delivery_date) with a description of each — and the AI reads messy, human-written text and returns clean, typed values. ‘My package #48291 hasn’t arrived, it was supposed to come Tuesday’ becomes order_id 48291, issue ‘late delivery’, expected date Tuesday. It’s transformative for automating anything that arrives as free text: parsing invoices and receipts, extracting lead details from contact-form messages, or structuring support tickets before they hit your CRM. Tips: describe each field precisely (‘delivery_date: the date the customer expected delivery, in YYYY-MM-DD format’), and mark fields required only when truly needed — over-constraining causes failures on imperfect inputs.
22. Window Buffer Memory

AI models are forgetful by design — each call starts fresh. The Window Buffer Memory node fixes that by handing the agent the last N messages of the conversation (the ‘window’, typically 10–20), so chatbots and agents can hold real multi-turn conversations: follow-up questions, ‘what about tomorrow?’, corrections — all understood in context. The critical setting is the session key (usually the chat ID or user ID): it keeps each user’s memory separate, so one user’s conversation never leaks into another’s. Use it with the AI Agent node for chatbots and assistants. Know its limits: it’s short-term memory only — restart the chat and it’s gone. For long-term memory across sessions (remembering user preferences permanently), n8n offers Postgres, Redis, or MongoDB memory nodes instead.
KEEP LEARNING
Want to go deeper? These official n8n resources will help:
n8n Quickstart — official n8n video
- n8n official YouTube channel
- n8n documentation
- n8n text courses
- Workflow templates library (free JSON templates to import)